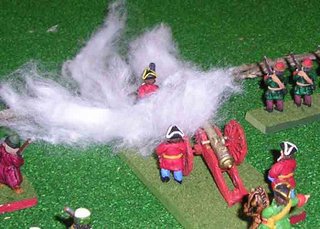
Wednesday, September 27, 2006

Troop Morale in BTW --

In the 18th Century rules I am writing for our local gaming (Northern Vancouver Island, BC, Canada), I have five or six morale grades (depending upon how you count them). However, for the most part there are effectively three grades.

This sounds strange, I know. Two of the morale grades (Raw and Poor) are effectively the same. The difference is that Raw units are essentially newly raised units; andPoor units were once Veteran (or better) and have since lost that status.

The very best troops, of course, are the Guards. But in the entire army, only one unit of foot and one unit of mounted are ever allowed to exist at any one time.

Militia are the very worst troops -- but only because they have not received enough training yet. They are the result of a ruler rashly rushing them into action too soon.

So, the three "common" troop types are: Raw/Poor, Veteran and Elite.

In "Bluebear's Tricorne Wars", all troops have "good days" and "bad days" (just as in real life). And no general knows before the battle how any unit will respond on "the day". They will know the general morale grade -- but not how they'll respond that day.

To determine their actual "morale number" for that particular battle, they will dice for it once it becomes necessary for them to know it (i.e., once they're in contact with the enemy). These numbers range from 1 to 5 (higher is better). Most are rolled for with Averaging Dice, which are numbered 2,3,3,4,4,5 although some use a d3:
  • Guard -- roll 2dAv, take higher die (range 2-5) -- but get better of 2d6 when testing
  • Elite -- roll 2dAv, take higher die (range 2-5)
  • Veteran -- roll 1dAv (range 2-5)
  • Raw or Poor -- roll 2dAv, take lower die (range 2-5)
  • Militia -- roll 1d3 (range 1-3)
Thus, even very good troops can have a very bad day or bad troops a good one -- although that's not the way to bet.

These "basic morale numbers", along with various tactical bonuses and/or penalties determine what number (or less) must be rolled on 1 d6 to succeed -- with a "1" always succeeding; and a "6" always failing.

More on "Bluebear's Tricorne Wars" in future posts.


-- Jeff
Monday, September 25, 2006

Painting Horses --

Stokes Schwartz hates painting horses (he sent a comment to my last post saying so). He asked how I paint mine.

Sorry to tell you this, Stokes, but I actually spend less than two minutes of "brush time" per horse.

What? How is that possible?

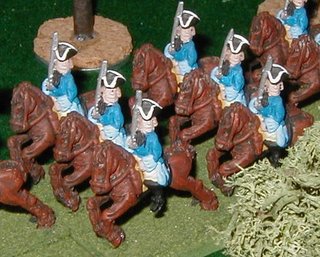
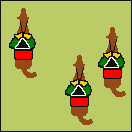
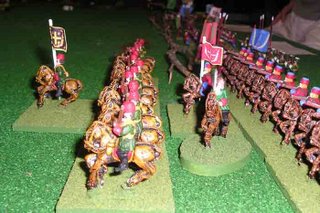
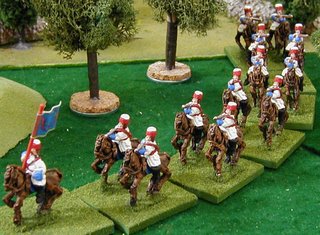
First, you need to accept the concept that the critical visual focus of a mounted figure should be the rider. As long as the horse looks "reasonable" (and not too flashy), what viewers focus on is the rider -- note the first photo.

(Note -- this in no way belittles or criticizes those who paint beautiful horses -- it just represents a different philosophy.)

So, for those who agree with my philosophy, this is how I paint horses:

  1. I "black prime" the figures -- generally this takes a number of light coats from various different directions -- including from below to get the horses' bellies.
  2. After the priming coat is completely dry, with a large brush I do a very quick white "damp brush". At this point, the figure should still have a lot of black on it, particularly in recessed areas.
  3. After the white damp brush has dried, again with a fairly large brush, I do another quick damp brush with a "horse color" -- yellows, tans, browns, red-browns, etc. -- after this step, the horse should have perhaps two thirds the horse color, and more or less even amounts of black and white showing through. Also, please note that each horse will look slightly different at this point, since each of the "damp brush" steps will have left paint in slightly different places.
  4. Again, after the last step is dry, the final step is to use a (somewhat diluted) ink. I use a fairly dark brown ink (not black), I dilute it (with water) so that it will allow more color through and flow easily. This tones down some of the "brighter" horse colors (such as yellows or red leathers, etc.) . Since I generally have about three horses on a craft stick, I start this step with the horses upside down (belly up). I apply the diluted ink with again with largish brush (but not the same one I use for the damp brushing). This is a pretty "wet" process, so I'm careful to be wearing clothes that my wife doesn't matter getting "spattered" (I use an old BarBQ apron). So I slosh this over the horse from below, then turn it over and do the same from above. This is somewhat scary because the figure now looks like it is all the ink color.
  5. Don't panic. You can use the "inking brush" to somewhat "wipe down" the excess diluted ink where it is particularly heavy . . . but gravity and evaporation will do your work for you. Just let them dry.
But what about reins and stockings and stars?

I ignore them. Again, my philosophy is that the focus should be on the RIDER, not the horse. I do paint the horse blanket, but that's about it.

Even although the flash has "washed out" the colors, if you look at the picture to the left, you can see how each horse has slightly different shading; and how the reins and halter are outlined by the ink -- it's enough that from a distance you don't notice that they aren't painted -- your focus is on the rider.


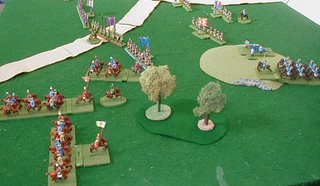
Now, if you look at the final photo (from a game), you will notice that the Cossacks on the left have different horse colors; while the Swedes entering on the right have a uniform horse color.

(You may want to "click" on the photo to bring up a larger version of it).

And, sure, the Cossaks have irregular "uniform colors" as well as horse colors; but notice how the slight variations make a difference.

Now, I do not suggest that this is the only way to paint horses, but it is effective for me. It is certainly quick (as I say, I've been timed doing a unit of horses and the brush time was not much over a minute per horse -- drying time took longer of course).

Stokes, give this a try with a few horses and see what you think . . . if you don't like it, it is certainly easy to strip or paint over them.


-- Jeff

Thursday, September 21, 2006

A Few Thoughts on "Fog of War" --

I am a gamer who appreciates a lot of "Fog of War" in my games. I also like lots of "command and control" problems.

That is why my "Tricorne Wars" rules will have a number of mechanisms to encourage these.


In the coming weeks I hope to detail some of them . . . but not today (it was a bear of a day and I'm tired).

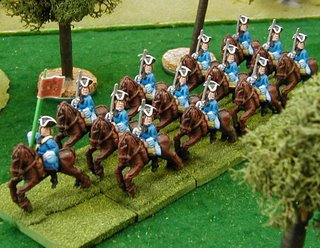
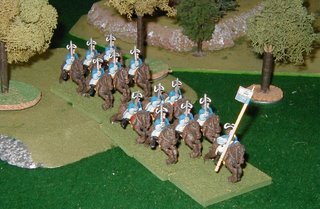
Instead, for your viewing enjoyment, here's another shot of some Swedish cavalry.


-- Jeff

Tuesday, September 19, 2006

A Few Colonial Photos --

Not much happening with my SYW project at the moment . . . so I browsed through a few old gaming photos.

I pulled a few "Colonial" game shots so you can see the "Arab houses" I mentioned in the article about the "Old West" buildings (September 12).

These are even easier to build than the Old West buildings. For a tutorial, go to this website:

http://www.zeitcom.com/majgen/30str.html

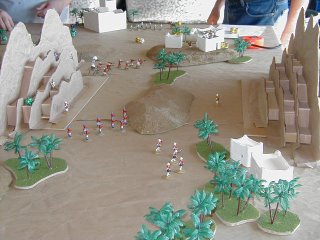
The first pic is a typical desert village under attack by a British unit. Native allies leap from the oasis in the village's defense.

The tabletop is covered with crumpled up brown paper -- which makes a very reasonable "desert" surface.

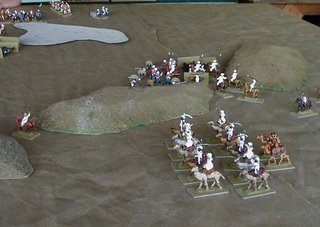
The second photo shows a different battle. Please note the hills on the sides. Sadly, I had to leave them behind when we moved.

However, they are fairly easy to build and are very useful. Hopefully my old gaming buddy, Bill is putting them to good use.

Again, for a tutorial, visit the Major General's website at:

http://www.zeitcom.com/majgen/24mtsc.html

I built mine along his lines, but used balsa rather than cardboard for the strips between the hill sections (for strength).

The final two photos are from yet a third Colonial game. Picture #3 shows Arab reinforcements. While the horsemen engage a British unit just over the hills in the middle, the camel riders head for the village with the black powder that their canon needs.

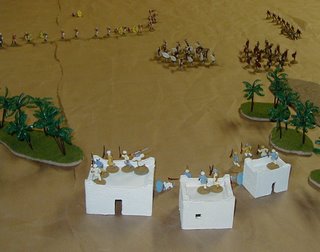
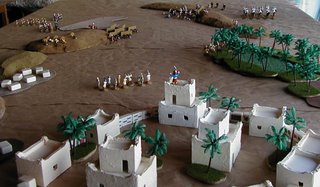
The final picture is from the other end of the table. (You can barely make out the camel riders in the top right corner of picture #4).

Again you see a selection of the "Arab houses" . . . and, yes those are mah jong tiles forming the village walls (as well as the ruins to the left).

For my Colonial games, I use a set of rules that I've written called "Khyber Knife". Which are sort of an amalgm of TSATF, GASLIGHT and my own ideas.

And, to end on a literary note (for those who don't immediately recognize my game title, it is taken from Rudyard Kipling's "The Ballad of East and West":

They have taken the Oath of the Brother-in-Blood on fire and fresh-cut sod,
On the hilt and the haft of the Khyber knife, and the Wondrous Names of God.

Colonials have a very different flavor than Eighteenth Century warfare -- and it makes a nice change of pace.


-- Jeff

Monday, September 18, 2006

Unit Sizes in "BTW" --

Because I'm writing "Bluebear's Tricorne Wars" for our local group with a secondary purpose of encouraging them to paint lead, my unit sizes are perhaps smaller than I'd really like.

Each stand of 4 infantry (a company) or 3 cavalry (a squadron) nominally represents something between approximately 100 and 150 troops.

To be a valid "battalion", the unit must contain 4-6 companies. This means a 16-man unit up to a 24-man unit.
(Actually it means a 17-man unit up to a 26-man unit).

What?

In addition to the 4-6 companies, each unit needs a "colour stand" with one or two flags. Please note that there should be no flags on the command company stand. This is because the position of the "colour stand" indicates the "cohesion"
(some might say "morale state") of the unit.
  • If positioned in front of unit -- steady (best cohesion)
  • If positioned "in the front line" -- rattled
  • If placed immediately behind the unit -- disordered
  • If placed behind the unit, facing backwards -- shaken
  • If moved well behind unit, facing backwards -- broken (routing)
I should note that even converged grenadiers (who normally did not have colours) and light infantry (ditto) will have a "colour stand". It is an easy, attractive way of indicating cohesion.

Mounted units also have a "colour stand"; although in their case it is a single figure with flag. Squadrons, as previously mentioned, have three figures each. For "Bluebear's Tricorne Wars", a regiment is comprised of 2-5 squadrons.

Thus a mounted unit could vary from 7
(six + colour) to 16 (fifteen + colour) mounted figures. (note -- see September 13 blog for basing conventions).

Artillery pieces do not use a flag; but rather an officer as their "colour stand". Again, his position (in front, beside, behind, etc.) indicates the current condition of the unit.

I am a great fan of the "look" of the tabletop. I do not like to see any sort of "label" or "casualty cap", etc. cluttering up the look of the battle. So I've tried to find ways to show things without using such items.

More about my rules as this blog progresses.


-- Jeff
Sunday, September 17, 2006

The Grand Scheme --

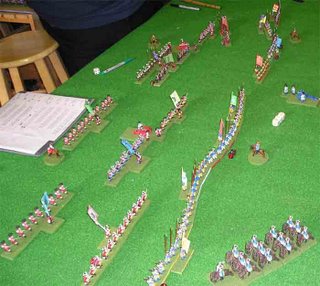
Well, for now at least, here's what I'm planning.

I've got a bunch of RSM figures for my Saxe-Bearstein troops (note -- loosely based on SYW Hanoveran uniforms). I also have a whole bunch of very old SYW 25mm figures that I got at a convention flea market over 25 years ago.

They're what I call "small 25s". I'm not sure of the manufacturer, but they are certainly not up to the RSM standard . . . but I have around 450 foot and 100 cavalry of these figures.

Anyway, my hope is to encourage others in my area
(northern Vancouver Island, BC, Canada) to build their own imaginary armies. One guy is pretty much set; but a couple of others will need to see troops on the table.

So, my current plan is to spray them with white primer
(actually, several coats of white primer) and base them on the Austrian . . . excuse me, Eaglestein . . . forces. Since the nice thing about Austrians is that white is the dominant color so they won't take a horrible amount of finishing.

True, they won't look anywhere nearly as good as my Saxe-Bearstein troops, but that's partailly the point, isn't it?


-- Jeff

Thursday, September 14, 2006

More Saxe-Bearstein Flags --

Not long ago (September 1 to be exact) I disclosed the basic infantry and cavalry flag patterns for my imaginary 18th century principality of Saxe-Bearstein.

Today I will continue with more of the unit flag styles I intend to use.

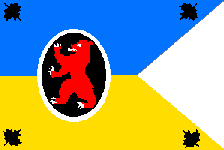
As before, the central image is
of the Saxe-Bearstein red bear (paying homage to the original 14th century Swiss mercenary battalion that eventually founded the principality). The oval containing the bear has a background of the hat-tape color.

In the "corners" of the flags is the grapeleaf pattern honoring the fine beverages for which Saxe-Bearstein is so justly famous.

The first flag style is that of a Dragoon unit . . . and here I'm "cheating" a bit.

In general, I'm basing my units on a Hanoveran model; but historically both Horse and Dragoon units had white uniforms -- and I wanted them to be different from each other.

So I've decided that my
Saxe-Bearstein Dragoons will be wearing "gold" coats in honor of the grain from which they brew their fine beers and ales. The blue in the flag means that their regimental color is blue.

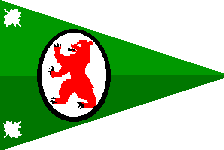
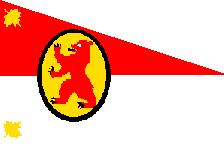
The next pair of flags represents a pair of Hussar units. Actually, they are used for the two different uniforms for Luckner's Hussars . . . but I'll use them as separate units.

The first uniform was green-over-green and the second red-over-white, so guess what the flags look like?

With all of the lace and frogging available on Hussar units (and no tricorns), I could basically choose the color of the background for the "bear oval".

It would be pointless to have a white-leaf-on-white, so it became gold . . . and therefor I chose white (as a contrast) for the first flag.


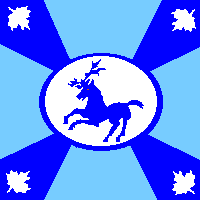
Those who read my post on the History of Saxe-Bearstein (August 31) may have noted that some time in the past (1509, to be precise), the neighboring valley of Saxe-Deerstein had been brought under the control of the von Ursa's Saxe-Bearstein.

While the two small nations have long been one, the Deersteinians do maintain their own proud tradition by wearing their own color coats and fighting under their own "colours" (the prancing deer).

If you are curious about this, just think -- it either allows me to use them as part of the same army OR as combatants against each other.

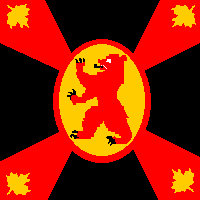
Just as with the Saxe-Bearstein flags, the color of the diagonal rays are the coat color; the "cross" color is that of the unit difference color; and the corner leaves and oval background are the button/hat tape color.

The final flag is, of course, for one of the Saxe-Bearstein foot battalions. They will have red coats; black trim and gold buttons and hat lace.

Even though these last two flags are quite similar, notice how different they look because of the axis of the central oval.


The particularly observant amongst you may notice that the "rays" are slightly wider than they were on the earlier flag models.

I decided that I wanted a bit more of the "coat color" to show, so I used a graphics program to widen them a touch.


-- Jeff
Wednesday, September 13, 2006

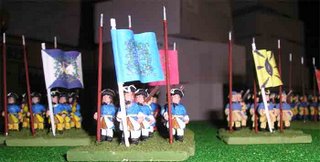
Basing for "Cavalry" Squadrons --

For the purpose of my rules, "Tricorne Wars", I have four types of "cavalry" squadrons.

There are two types of "Heavy Horse" and two types of "Other Horse".

I divide Heavy Horse, the "True" cavalry, into two types -- common and shock -- which I'm calling "Trotters" and "Gallopers".

"Trotters" form the bulk of true cavalry in the 18th century. They may or may not have had armour, but they did use their pistols and they tended to charge more deliberately. The first diagram shows "Trotter" basing.

"Gallopers" generally eschewed the use of pistols and preferred to close with cold steel at a rapid rate. The second diagram shows "Galloper" basing (with a distinct "wedge" formation).

Both of the above "Heavy Horse" are based more tightly (i.e., on a narrower base) than the two types of "Other Horse".

"Dragoons" were originally "mounted infantry"; but by the middle of the 18th century were trained and used in much the same way as "true cavalry". They were, however, generally paid much less and mounted on more inferior horses.

Dragoon basing is illustrated in figure three. Note the wider element base and the central horse slightly behind the flankers.

Finally, the last type of mounted is "Light Horse". Typified by Hussars in their wonderfully colorful uniforms, but also including Cossacks, etc., "Light Horse" genreally operated in more open formations.

Figure #4 shows the basing style for Light Horse. While the base is the same width as that of the Dragoons, it is deeper and the figures are placed more irregularly.

It should be noted that both "Other Horse" types (both Dragoons and Light Horse) were often detailed to duties more in line with "campaigning" than the battlefield.

"Other Horse" provided scouts, screens and foraging . . . tasks considered beneath the more elite "Heavy Horse".

One of the aspects of my "Tricorn Wars" rule set is that all units have a chance of not showing up . . . or of showing up in limited numbers.

Regiments roll to see how many squadrons will show up. "Other Horse" rolls 1d6; but "Heavy Horse" takes the better of 2d6 to see how many squadrons actually make it to the battle (with a 1 meaning none show).

More on my rules over the coming weeks.


-- Jeff

Tuesday, September 12, 2006

Buildings for the "Old West" --

For some reason I keep getting sidetracked away from my intention to write about my Seven Years War project.

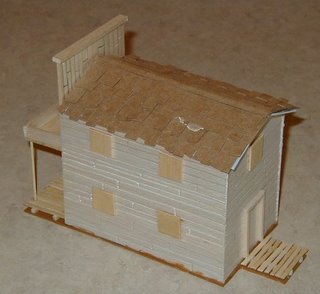
Well, today I came across some photos I took of some "old west" building I built about a year ago.

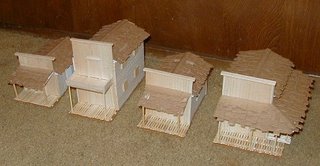
Picture #1 shows the four in a row. They are all slightly different shapes and heights; and no two are alike (although two are pretty similar).

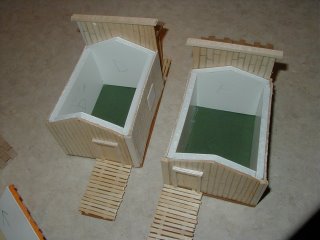
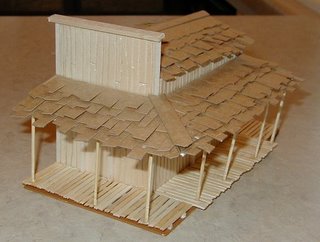
Picture #2 should give you an idea of how I constructed them.

First, I built the four walls of foamcore. I then glued thin sheet balsa to the four sides.

Then I traced and cut out a cardstock "base" for not only the building, but with a rear walkway to an outhouse and a front walkway.

I used an old dull pencil to scribe the psuedo-board shapes into the balsa.


The roofs were made of two pieces of cardstock held together with masking tape. This was then covered with "shingles". These were made while watching TV as I simply cut strips from cereal boxes and then clippped them into odd shapes.

As you can see from picture #3, I added strips of balsa trim around doors and on top of the "false fronts".

You can also see that I used strips of clipped-off "craft toothpicks" to create the walkways.

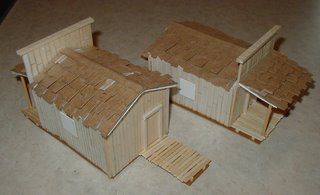
Pictures #4 and #5 show some two storey buildings. The first is a "hotel" with balcony; and the second, a corner saloon with a walkway around it.

All of these buildings were surprisingly simple to make. A little time-consuming, but really rather easy.

One piece of advice though -- pre-planning is vital. For example, while the buildings are of differing sizes, I made sure that the fronts and sides were such that I could use standard sizes of balsa to clad them.

Oh, and if you ever wondered why so many "old west" buildings had those "false fronts" . . . it was because frequently all that was behind them was a big tent (and not a building at all).

Also, keep in mind that much of the "old west" was actually on the prairies where wood was in short supply.

Hopefully my next post will get back to the real focus of this blog -- the principality of Saxe-Bearstein and the Tricorn Battles of the "Wars for Arcadian Glory".


-- Jeff

Monday, September 11, 2006

Even More GNW Photos --

You guessed it . . . more photos of my Great Northern War figures.

These, sadly to say, are not from a game. Instead they were simply placed on some convenient terrain for pictures.

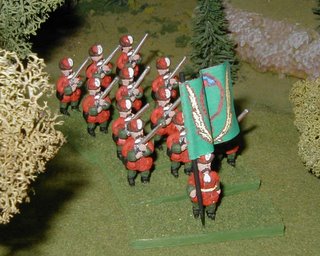
The first photo is of a Russian musketeer unit.

While the "traditional" Russian colors were green coats with red trim, many of the units at the start of the eighteenth century wore different colors.

Many Russian units wore red (as in picture #1), blue and white as well as different greens.

Likewise, while everyone knows that Swedes always wore blue, there were exceptions.

Picture #2 shows a Swedish Dragoon regiment which was uniformed in green.

The next photo (#3) shows an artillery unit.

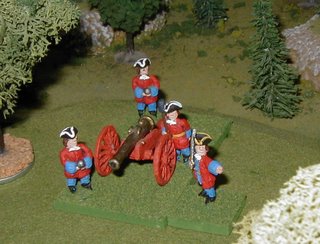
The three figures on the gun base tell me that it is a "medium" gun (4 to 9 pounder in my rules).

The single figure (with sword) is a "command" figure whose position is used to indicate the unit's current "cohesion".

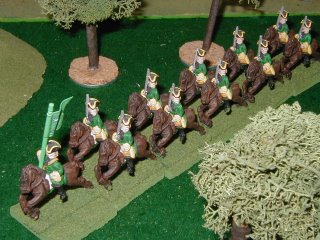
Finally, the last unit pictured is a Swedish cavalry unit.
Once again, the single figure leading the unit is a "cohesion" marker.


Remember, if you "click" on any photo, you will get to see a larger version of it.

Enjoy!


-- Jeff

Saturday, September 09, 2006

Some More GNW Pictures --

Well, due to several requests, I'm interrupting my "basing" posts to bring you some more pictures of my Great Northern War figures.

All figures are 25mm Blood Axe figures. These were made by Lance Runolfsson (not sure of that spelling) in Oregon. Unfortunately, I believe that he has retired from casting lead.

These photos are from the second playtest of my rules. The scenario was
inspired by the Battle of Fraustadt in 1706, which featured Swedes attacking a mixed force of Saxons and Russians.

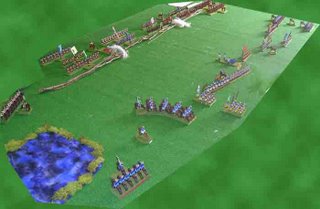
The first photo shows some of the Russian Dragoons who were stationed on the Allied left flank -- which is at the "top" of the second photo, which shows the overall look of the battlefield as action commenced.

Swedes are on this side of the photo; Saxons on the far side, towards the bottom of the photo; and Russians are near the top.

The next photo shows a Russian gun (the topmost puff of smoke) firing into the Swedish right.

The next photo shows the battle as the forces closed with each other. Again, the Swedish forces are on this side. Please note the "curved" line of battalions. This was achieved because the rules I'm using allow for a "brigade line" . . . but such a formation rolls its movement for both ends and the middle. This can create some (to me) more realistic-looking lines.

The final photo is from the first playtest and it shows some of the Swedish infantry units marching in column.

The flags are from Dan Schorr, whose "Northern Wars" website is a must for anyone interested in the Great Northern War.

The URL for his website is:

http://www.northernwars.com/

and I most heartily recommend it.

I will post more photos sometime later, so keep checking back for more photos . . . who knows, perhaps next time I'll show you some of my Danes.


-- Jeff
Basing for Infantry --

When you really get down to it (as far as basing troops goes), there are really only three basic types of infantry in European mid-eighteenth century warfare -- regular troops, irregular troops and skirmishing troops.

The vast bulk of troops are "regular" troops -- that is trained "professional" soldiers. Now, since I really don't like the looks of single-ranked troops representing a "battalion", I wanted my troops double-ranked -- like this.

And, while I basically selected "Koenig Krieg" style basing (four figures on a stand -- in two rows of two), I wanted larger units. Hence, in my rules, a battalion ranges from 16 to 24 figures (4-6 stands).

Irregular troops, while sometimes acting in solid blocks (like regulars), needed to have a different look to them. Thus I decided upon a deeper base and a loose "diamond" formation for each "company" (four figures). Thus, they will look like this.

Now, for both the regular and irregular "line-type" troops, each stand of four figures represents a "company" (with 4-6 companies per battalion). However, I needed something different for "jaegers" and other true "light infantry".

In my opinion, such troops are generally afforded too much strength under most rule sets. True "light infantry", while very valuable on campaign, were of little real value on the battlefield. About the best that they could do was to occupy "bad ground" and delay opposing troops.

Thus, while each base still represents a full company, only two figures (instead of four) are used. The rest are hiding , moving or reloading. Thus I'm using a base twice the width of a "regular" base -- but twice as wide.

My next post will probably be about my choices for basing mounted troops.


-- Jeff
Friday, September 08, 2006

Basing Figures -- General Format

Individually based figures are a pain to move if playing anything beyond a "skirmish" game. On the other hand, I like the idea of "figure removal"; and leaving the "dead" lying on the table helps the overall look of the tabletop.

My solution (and I'm sure that I'm not the first to think of this) is to use magnets to hold figures onto a base and to remove them as they become casualties.

However, what I will be using is neodymium (also known as "rare earth") magnets. These are very small, yet very strong magnets. I intend to use small disk magnets that are 0.275" in diameter and only 0.04" thick -- tiny little things. While there are many manufacturers, here is the one I intend to use:

http://stores.ebay.com/Rare-Earth-Neodymium-MAGNETS

In future posts, I will get more specific about my basing; but suffice it to say that most infantry is based four to a stand (in two ranks); and cavalry three horses wide on a stand.


-- Jeff
Thursday, September 07, 2006

Rules & "WAG" --

There are a great many rules available for 18th Century tabletop gaming . . . but none that I've found quite suit my taste. Hence, in a tradition as old as tabletop gaming, I am in the process of writing my own.

I'm wanting just the right rules for the WAG.

What? You say you've never even heard of the "Wars for Arcadian Glory"? . . . . Well, that's actually not so surprising since they are yet to be fought.

I'm living on Vancouver Island -- off the western coast of Canada -- and the local gaming group is called the "Arcadian Guild". Here's a link to their website:

http://members.axion.net/~murdock/

Anyway, my eventual goal is to encourage a number of members of the Arcadian Guild to build mid-18th century armies (for imaginary countries) . One very active member is already working on his army.

We've had a few "playtests" of my rules . . . and they went pretty well. Not perfectly, of course, but we were able to identify several areas that needed more attention.

We had a very enjoyable refight of the 1706 Battle of Fraustadt . . . . which, although of an earlier war ("Great Northern War" -- with Pike & Shot on both sides), allowed me to see what worked and what needed work.

So, now I am working on an update of "Bluebear's Tricorne Wars" version 0.2.


-- Jeff


Friday, September 01, 2006

Unit Colours --


No, I don't mean uniform colors. I mean the flags that are with each unit.

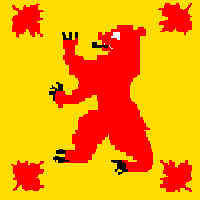
The flag to the left is the "national colour" of Saxe-Bearstein. It has the "red bear" that the original mercenary company ("The Bears") carried when the left Switzerland all those centuries ago.

The "field" is grain gold in color in honor of the grain that is brewed into the wonderful beers that Saxe-Bearstein is so famous for. The "grape leaves" in the corners honor the wines for which the principality are also so well known.

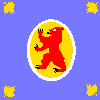
Cavalry "colours" (also known as "standards") contain the Saxe-Bearstein red bear in a center oval. The color of the oval and the corner grape leaves is the same as the "button color" of the unit's uniforms.

The major background color of the rest of the cavalry standard is in the regimental color -- the same as their cuffs and other trim. Cavalry standards are square (as are infantry colours) but are smaller than infantry standards.

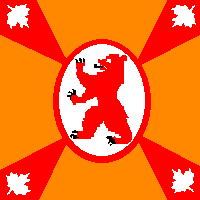
Infantry standards follow much the same pattern as the cavalry . . . but with the addition of diagonal "rays" in the color of the uniform coat (which is usually red).

Again, the color of the oval is in the "button color"; and the major color of the "cross" is in the regimental cuff color.

I believe that these flags (while totally "made up") are quite successful in representing the "Seven Years War look".


-- Jeff